Alright, so you’ve just logged in. Maybe it’s your first time, or maybe you’ve been here before but still feel like you’re clicking around randomly. No worries—I’ve got you covered. Let’s break it all down, step by step, so you know exactly where to go and what to do.
1. Project List: Your Starting Point

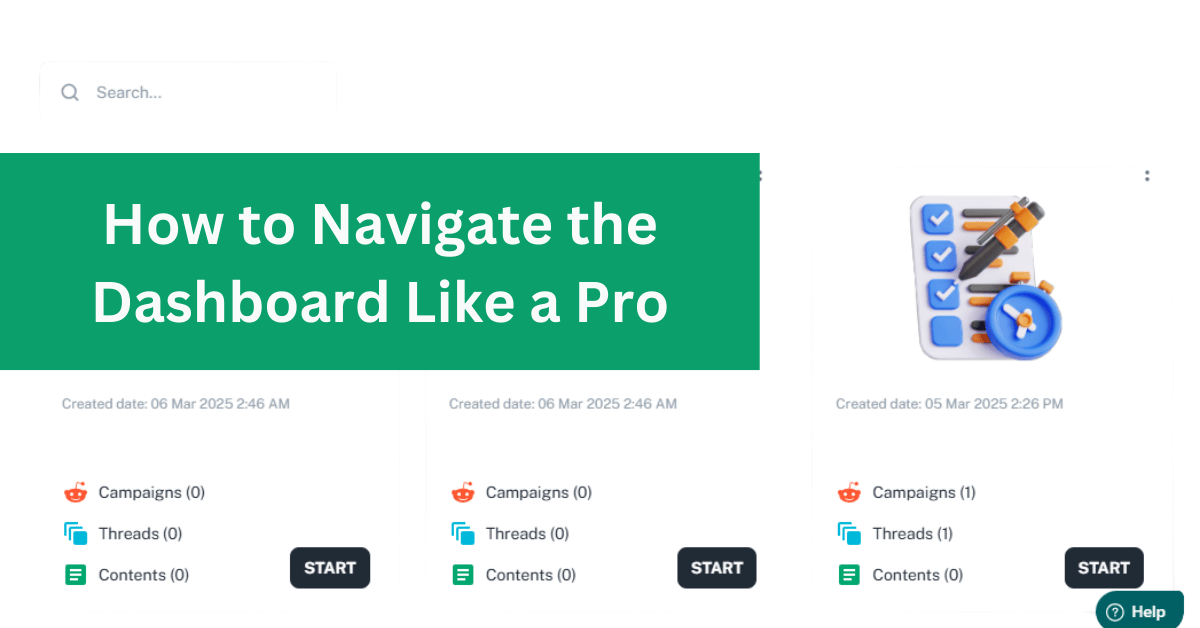
First things first—you land on the Project List. Think of this as your home base, where all your projects live. If you’re starting fresh, click “Create a New Project” and give it a name.

Now, here’s something important: Do you have an API? If yes, this is where you select ChatGPT-4 as your model. If not, don’t worry—you can still work with the default settings.

Next, you pick a platform. If you’re researching audience conversations on Reddit, select that, hit Save, and then click Next.
2. Campaigns: Defining What You’re Looking For
Now that your project is set, it’s time to create a New Campaign. This is where you tell the dashboard exactly what kind of content you want to find.
- Keywords or Subreddits? If you have specific keywords, enter them here and click Save & Next. Prefer to search within certain subreddits instead? Select Subreddit instead of keywords.

- Fine-tune your search. Adjust settings like Threads, Upvotes, and Comments. This helps filter out low-quality posts and gives you only the most relevant discussions.

- Pick a time frame. Choose from 7, 30, or 90 days, depending on how recent you want your data to be.

- Click Create Campaign—and just like that, your campaign is set up!
3. Saved Threads: Bookmarking Your Best Finds
Once your campaign pulls up relevant results, you’ll want to go through them and pick the ones that matter most. Instead of sifting through everything later, you can save threads right here.

So, what exactly gets saved? These are the specific threads you selected from the campaign results—not just random posts. Saving them makes it easier to go back later without digging through all the noise.
4. Prompts: Customizing the AI Response
Now that you’ve selected threads, it’s time to generate content—but first, you need a Prompt.

- If you haven’t created one yet, click New Prompt, add a title and instructions, and save it.

- Already have a prompt? Just select it from your saved list.

- You can edit, delete, or fine-tune prompts anytime for better results.
Your prompt acts like a set of instructions for the AI—it determines the tone, structure, and details of the generated content. Once you’ve got the right prompt selected, it’s time for the AI to work its magic.
5. Content: Editing & Finalizing Your Output
After the AI generates content based on your prompt, the results don’t just disappear—they’re stored under Content.

This is where you can:
- Review and edit the generated output.
- Revise it if needed to improve clarity or add missing details.
- Upload a feature image to make the content visually appealing.

Think of this as the final step before publishing or using the AI-generated content. If you need a quick tweak, this is the place to do it.
6. ChatGPT: Your History Hub
This is where you can see your full conversation history—everything you’ve worked on. But it’s more than just a list of past outputs.

Each entry includes:
- The original thread (OP post) you pulled from.
- The prompt you used to generate content.
- The AI-generated response.
It’s like a neatly organized record of your creative process, making it super easy to revisit and tweak past work.
7. Profile: Your Account Settings
Finally, let’s talk about your Profile. This is where you manage all the behind-the-scenes stuff:

- Change your password if needed.
- Manage your subscription and billing.
- Set up or update your Global AI Key for API access.
Not the most exciting section, but definitely important.
Once you get the hang of the dashboard, everything falls into place. Here’s the quick recap:
- Project List → Start here. Create a project, choose a platform, and (if needed) select ChatGPT-4.
- Campaigns → Enter keywords or subreddits, adjust filters, and launch your search.
- Saved Threads → Store the most relevant threads from your campaign results.
- Prompts → Customize AI responses with detailed instructions.
- Content → Edit, revise, and finalize your saved outputs, including adding a feature image.
- ChatGPT → See your full history, including OP threads, prompts, and generated responses.
- Profile → Edit your password, subscription, and Global AI Key.
And that’s it! You’re now officially dashboard-savvy. Now go explore, test things out, and if you ever get stuck, just come back here.